
很高兴迎来了第一篇,我们来讲讲项目中经常用到的 keep-alive 如何?
还犹豫啥,源码打开,搞起啊 🤜
概念
Keep-alive 字面意思就是活着,在代码层面实现的也就是这个能力,即让我们的页面或者代码能够在一定时间内不被销毁。
Vue官网的解释如下:
<keep-alive>包裹动态组件时,会缓存不活动的组件实例,而不是销毁它们。和<transition>相似,<keep-alive>是一个抽象组件:它自身不会渲染一个 DOM 元素,也不会出现在组件的父组件链中。当组件在<keep-alive>内被切换,它的activated和deactivated这两个生命周期钩子函数将会被对应执行。
一句话总结:keep-alive 主要用于保留组件状态或避免重新渲染。
用法
使用方法很简单,只需要用它包裹我们想要保留状态的组件即可,就像下面这样:
<keep-alive>
	<comp-a/>
</keep-alive>
也可以包裹动态组件,就像这样:
<keep-alive>
	<component :is="view"/>
</keep-alive>
当然,我们最常用的是直接用它包裹整个 router-view ,这样就可以保留我们页面中所有组件的状态,换句话说就是保留了页面级的状态,像下面这样使用:
<keep-alive>
	<router-view/>
</keep-alive>
但是要注意的是,如果页面中有多个 router-view ,组件的状态只会以离它最近的一个 router-view 的状态为准,最外层的 keep-alive 可能不会对子 router-view 中的组件生效。
属性
要想正确使用 keep-alive 组件,必须了解它接受的属性(Props),目前只有3个:
include- 字符串或正则表达式。只有名称匹配的组件会被缓存。exclude- 字符串或正则表达式。任何名称匹配的组件都不会被缓存。max- 数字。最多可以缓存多少组件实例。
举个例子,我定义了2个组件,组件A和组件B,他们的代码如下:
<!-- 组件A -->
<template>
  <p>组件A</p>
</template>
<script>
  export default {
		name:'comp-a'
  }
</script>
<!-- 组件B -->
<template>
  <p>组件B</p>
</template>
<script>
  export default {
		name:'comp-b'
  }
</script>
现在,我想在路由切换时保持组件A的状态,就可以像下面这样:
<keep-alive include="comp-a">
	<router-view/>
</keep-alive>
其中我们给 include 传递了组件A的 name 属性,这就代表我们只缓存组件A,也可以写成数组形式,如 include="['comp-a']",正则也可以。
exclude 就是反向的,用法是一样的,只是指定不缓存的组件,大家可以自己尝试一下。
注意,这里要提的一点是,这类匹配首先检查组件自身的 name 选项,如果 name 选项不可用,则匹配它的局部注册名称 (父组件 components 选项的键值),而匿名组件不能被匹配,所有建议大家养成给组件命名的习惯。
至于 max ,其实就是最大可以保留的组件个数,由于 keep-alive 主要就是把组件的数据保持在内存中,但内存是有限的,为了避免内存占用过高,keep-alive 给我们提供了一个限制的属性(也就是 max),一旦缓存的组件数超过了 max,在新实例被创建之前,已缓存组件中最久没有被访问的实例会被销毁掉,也就是 LRU策略。
一般情况下不用传递 max,但如果我们的项目足够大,页面足够多,对内存管理有一定要求,最好手动指定一下这个值,以获得更好的体验。
还有一点要注意,<keep-alive> 不会在函数式组件中正常工作,因为它们没有缓存实例。
😃 好了,keep-alive 的基础我们已经复习了一遍,下面我们来看看它的源码吧~
源码
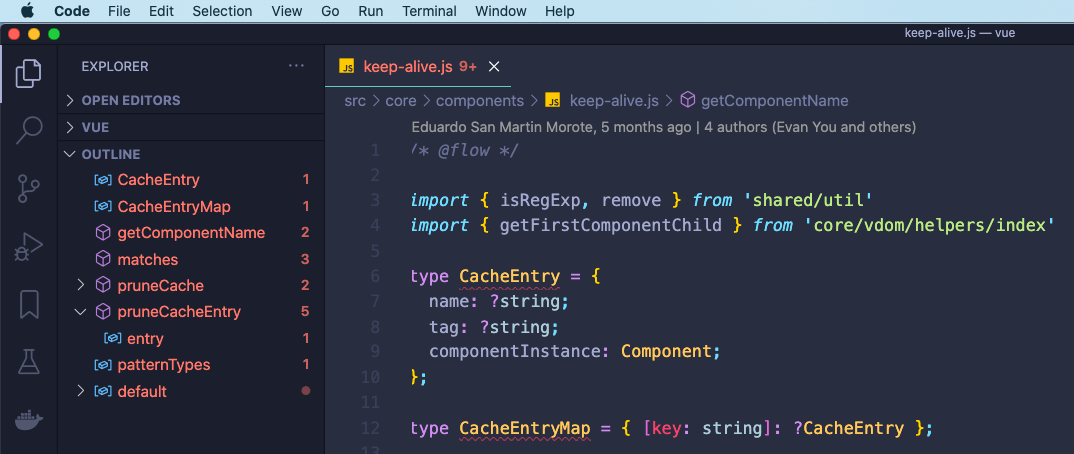
首先,keep-alive 源码位于 src/core/components/keep-alive.js ,大家可以打开看一下,整体代码很少,下面我们一段一段来读,这里推荐大家都使用 VSCode 来阅读以获得更好的体验。
可以看到 Vue2 使用了 Flow 来做类型检测,这里我们无需关心这些,只看核心实现即可。
为了对源码整体有一个认识,我们把编辑器切换到 大纲模式(OUTLINE) ,这样可以很方便的看到代码里所有的方法或类型,就像这样。
我们先来看一下里面用到的几个函数。
getComponentName
首先,有个获取组件名字的方法 getComponentName,它会首先判断是否传入了组件实例,然后优先获取组件的 name 属性作为名字,如果没找到(组件里没有定义 name),则以组件注册的标签名作为名字:
function getComponentName (opts: ?VNodeComponentOptions): ?string {
  return opts && (opts.Ctor.options.name || opts.tag)
}
matches
通过在代码里搜索该方法,发现它主要用来校验 include 和 exclude 的类型,这2个属性都只支持字符串、数组和对象类型。
function matches (pattern: string | RegExp | Array<string>, name: string): boolean {
  if (Array.isArray(pattern)) {
    return pattern.indexOf(name) > -1
  } else if (typeof pattern === 'string') {
    return pattern.split(',').indexOf(name) > -1
  } else if (isRegExp(pattern)) {
    return pattern.test(name)
  }
  return false
}
pruneCache
这个方法字面意思是 “删除缓存”,它接受一个 keepAlive实例和一个filter函数,首先从实例中取出 cache、keys和对应的 vnode。然后遍历整个 cache 对象,如果当前组件实例在缓存中并且参数合法,就执行 pruneCacheEntry 方法。
function pruneCache (keepAliveInstance: any, filter: Function) {
  const { cache, keys, _vnode } = keepAliveInstance
  for (const key in cache) {
    const entry: ?CacheEntry = cache[key]
    if (entry) {
      const name: ?string = entry.name
      if (name && !filter(name)) {
        pruneCacheEntry(cache, key, keys, _vnode)
      }
    }
  }
}
为了验证,我搜索该方法,发现它只在 mounted 生命周期里面调用了,如下代码,再结合函数内容,看起来是不是就很明白它做了什么:
mounted () {
    this.cacheVNode()
    this.$watch('include', val => {
      pruneCache(this, name => matches(val, name))
    })
    this.$watch('exclude', val => {
      pruneCache(this, name => !matches(val, name))
    })
  },
pruneCacheEntry
接着上面, pruneCache 最后调用了 pruneCacheEntry 方法,那么它做了什么呢?
function pruneCacheEntry (
  cache: CacheEntryMap,
  key: string,
  keys: Array<string>,
  current?: VNode
) {
  const entry: ?CacheEntry = cache[key]
  if (entry && (!current || entry.tag !== current.tag)) {
    entry.componentInstance.$destroy()
  }
  cache[key] = null
  remove(keys, key)
}
首先进行了一个判断,如果当前组件实例存在于缓存中,但和缓存中的标签名不一致,说明该实例已失效,直接销毁这个实例,后面的代码就是直接从 cache 中移除组件的实例。这里的 remove 是全局的工具方法,有兴趣可以自己去看。
cacheVNode
该方法主要是检查并缓存当前组件的实例,方法里通过 vnodeToCache 判断该组件是否需要缓存,需要的话就会往 cache 变量里写入组件的相关数据(组件名、标签、实例),同时也会把当前组件的 key 存储下来。
同时在函数最后,我们发现它会检查当前缓存的组件数是否超过了 max ,如果超过会使用 pruneCacheEntry 方法移除离最近使用时间相隔最久的那一个组件实例(不传 max, 这个判断并不会生效,这里实际上维护了一个LRU队列),比较讲究的是,最后还手动把 vnodeToCache 赋值为 null,用来触发标记清除。
cacheVNode() {
      const { cache, keys, vnodeToCache, keyToCache } = this
      if (vnodeToCache) {
        const { tag, componentInstance, componentOptions } = vnodeToCache
        cache[keyToCache] = {
          name: getComponentName(componentOptions),
          tag,
          componentInstance,
        }
        keys.push(keyToCache)
        if (this.max && keys.length > parseInt(this.max)) {
          pruneCacheEntry(cache, keys[0], keys, this._vnode)
        }
        this.vnodeToCache = null
      }
    }
以上就是该组件中用到的几个主要函数。
下面,我们从 Vue 生命周期的角度看看 keep-alive 组件怎么运作的?
首先,该组件多了一个 abstract: true 的属性,这个代表该组件是抽象组件,并不会渲染出具体的Dom。
created
在这个生命周期里,组件初始化了2个变量
- cache 主要用来存储各个组件的缓存实例
- keys 主要用来存储各个组件的 key
 created () {
    this.cache = Object.create(null)
    this.keys = []
  }
mounted
前面也提到了这个,在这里,首先会调用 cacheVNode 去检查并缓存该组件实例,然后对 include 和 exclude 这两个属性做了一个监听,当它们改变时,会触发 pruneCache 去对缓存的数据做一些操作。
mounted () {
    this.cacheVNode()
    this.$watch('include', val => {
      pruneCache(this, name => matches(val, name))
    })
    this.$watch('exclude', val => {
      pruneCache(this, name => !matches(val, name))
    })
  }
updated
这个生命周期里只做了一件事,那就是重新对当前组件缓存进行一次检查。
updated () {
   this.cacheVNode()
}
destroyed
这个周期里,也只做一件事,就是清除所有组件的缓存实例。
  destroyed () {
    for (const key in this.cache) {
      pruneCacheEntry(this.cache, key, this.keys)
    }
  }
render
那么最重要的部分其实全在 render 里,这里我们重点读一下。
- 通过
this.$slots.default获取组件的默认插槽内容; - 通过
getFirstComponentChild获取插槽里的第一个子组件的vnode; - 取出该组件的
name并校验include或exclude,如果校验不通过,则该组件不需要缓存,直接返回组件的vnode,不再往下继续; - 如果当前组件需要缓存,则优先在缓存里查找是否有该组件的缓存实例,有的话直接返回缓存实例,没有找到的话就缓存一下;
- 最后使用
vnode.data.keepAlive = true标记一下该组件的缓存状态。
这里说一下,render 方法最后还会做一个判断,如果 vnode 并不存在,说明插槽里的第一个并不是一个组件实例,那就直接返回插槽内容即可。
render () {
    const slot = this.$slots.default
    const vnode: VNode = getFirstComponentChild(slot)
    const componentOptions: ?VNodeComponentOptions = vnode && vnode.componentOptions
    if (componentOptions) {
      // check pattern
      const name: ?string = getComponentName(componentOptions)
      const { include, exclude } = this
      if (
        // not included
        (include && (!name || !matches(include, name))) ||
        // excluded
        (exclude && name && matches(exclude, name))
      ) {
        return vnode
      }

      const { cache, keys } = this
      const key: ?string = vnode.key == null
        // same constructor may get registered as different local components
        // so cid alone is not enough (#3269)
        ? componentOptions.Ctor.cid + (componentOptions.tag ? `::${componentOptions.tag}` : '')
        : vnode.key
      if (cache[key]) {
        vnode.componentInstance = cache[key].componentInstance
        // make current key freshest
        remove(keys, key)
        keys.push(key)
      } else {
        // delay setting the cache until update
        this.vnodeToCache = vnode
        this.keyToCache = key
      }

      vnode.data.keepAlive = true
    }
    return vnode || (slot && slot[0])
  }
}
👌 我们已经分析完了整个源码,现在是不是清楚了很多呢。
但其实这个组件还涉及到很多原理性的东西,如果有兴趣,我们接着往下研究。
1、为什么在组件有缓存的时候不会再次执行组件的 created、mounted 等钩子函数呢?
这个涉及到虚拟Dom 相关的源码,这里简单说一下,主要和 componentVNodeHooks 这个方法有关系,其中满足 vnode.componentInstance && !vnode.componentInstance._isDestroyed && vnode.data.keepAlive 的逻辑并不会执行 $mount的操作,而是执行 prepatch,很明显嘛,而 prepatch 其实仅仅只是做了更新子组件的操作,相当于从缓存里取出了当前组件实例。
const componentVNodeHooks = {
  init (vnode: VNodeWithData, hydrating: boolean): ?boolean {
    if (
      vnode.componentInstance &&
      !vnode.componentInstance._isDestroyed &&
      vnode.data.keepAlive
    ) {
      // kept-alive components, treat as a patch
      const mountedNode: any = vnode // work around flow
      componentVNodeHooks.prepatch(mountedNode, mountedNode)
    } else {
      const child = vnode.componentInstance = createComponentInstanceForVnode(
        vnode,
        activeInstance
      )
      child.$mount(hydrating ? vnode.elm : undefined, hydrating)
    }
  }
在 prepatch 方法里执行了 updateChildComponent ,其主要做的就是执行了组件的 $forceUpdate() 方法,对于 keep-alive 来说相当于重新执行 render 方法。
  prepatch (oldVnode: MountedComponentVNode, vnode: MountedComponentVNode) {
    const options = vnode.componentOptions
    const child = vnode.componentInstance = oldVnode.componentInstance
    updateChildComponent(
      child,
      options.propsData, // updated props
      options.listeners, // updated listeners
      vnode, // new parent vnode
      options.children // new children
    )
  }
2、抽象组件不会生成真正的DOM节点,这是怎么做到的?
其实很简单,Vue 在初始化生命周期时,为组件实例建立父子关系会根据 abstract 属性决定是否忽略某个组件。在keep-alive中,设置了abstract: true,就该组件实例就会被跳过。
export function initLifecycle (vm: Component) {
  const options = vm.$options
  let parent = options.parent
  if (parent && !options.abstract) {
    while (parent.$options.abstract && parent.$parent) {
      parent = parent.$parent
    }
    parent.$children.push(vm)
  }
  vm.$parent = parent
  vm.$root = parent ? parent.$root : vm
  vm.$children = []
  vm.$refs = {}
  vm._watcher = null
  vm._inactive = null
  vm._directInactive = false
  vm._isMounted = false
  vm._isDestroyed = false
  vm._isBeingDestroyed = false
}
3、keep-alive包裹的组件是如何使用缓存的?
- 在首次加载被包裹组件时,由
keep-alive.js中的render函数可知,vnode.componentInstance的值 是undefined,keepAlive的值 是true,因为keep-alive组件作为父组件,它的render函数会先于被包裹组件执行;那么就只执行到i(vnode, false /* hydrating */),后面的逻辑不再执行; - 再次访问被包裹组件时,
vnode.componentInstance的值就是已经缓存的组件实例,那么会执行insert(parentElm, vnode.elm, refElm)逻辑,这样就直接把上一次的DOM插入到了父元素中。
function createComponent (vnode, insertedVnodeQueue, parentElm, refElm) {
    let i = vnode.data
    if (isDef(i)) {
      const isReactivated = isDef(vnode.componentInstance) && i.keepAlive
      if (isDef(i = i.hook) && isDef(i = i.init)) {
        i(vnode, false /* hydrating */)
      }
      if (isDef(vnode.componentInstance)) {
        initComponent(vnode, insertedVnodeQueue)
        insert(parentElm, vnode.elm, refElm) // 将缓存的DOM(vnode.elm)插入父元素中
        if (isTrue(isReactivated)) {
          reactivateComponent(vnode, insertedVnodeQueue, parentElm, refElm)
        }
        return true
      }
    }
  }
总结
本来只是想简单说一下 keep-alive 的原理,没想到一股脑写了这么多,可见一个知识点并不是孤立的。
本质上,keep-alive 就是通过两个变量 cache 和 keys 来缓存组件实例,cache 通过维护一个 LRU 队列来保证缓存个数不超过限制,然后结合 Vue 的生命周期钩子做了一些操作来保证组件的缓存得到最大限度的使用。